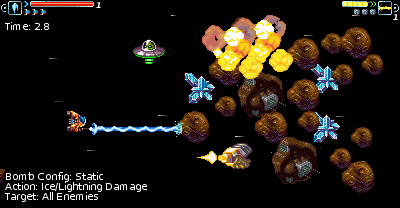
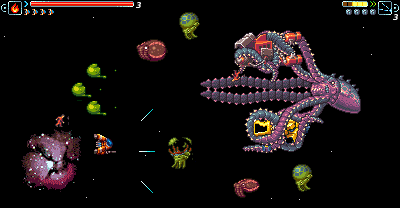
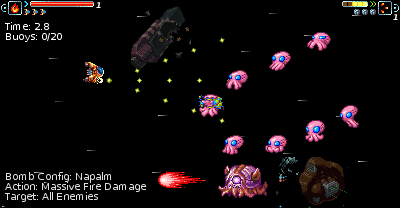
The Federation Space Academy (FSA) are the upholders, defenders, and maintainers of justice for the known universe. The FSA also acts as a parent government for the 347 charted regions of the universe, overseeing, assisting, and correcting governmental issues that arise in the smaller regional governments. The governing body of the FSA is referred to as FSA High Command. High Command is comprised of 917 different races, one or more being from each of the 347 charted regions of the universe. All major decisions must pass through High Command and be approved by unanimous vote. Minor decisions are allowed to be decided by the individual race's group of representatives.  Codename: Advent Class: X1-IWMD Service Status: Experimental/Prototype Approximate Dimensions: 14x14x14 Max # of Occupants: 1 Power Source: All Advent systems are powered by the QuantaCore Replenishing Power Generator. This system allows energy shields to regenerate, provides limited bursts of invincibility during near lightspeed travel, maintains life support suits, and provides a limitless supply of energy for onboard weapons systems. Weapon Systems: The Advent is classified as an Intergalactic Weapon of Mass Destruction. When fully powered, a single Advent has the destructive capabilities of roughly 40 Class A Dreadnaught Mark VIII Battlecruisers. Any and all details of the Advent's weapon systems functionality are highly restricted, and are only available to top ranking FSA commanders and scientists holding Top Secret security clearances. Energy Shielding Systems: The Advent is protected by a scaled down total hull shield system, similar to those found on much larger ships. As long as there is some shield energy available, the Advent's power source can continuously regenerate shield energy. However, If shield energy is fully drained, a direct energy input is required to restart shield regeneration. This is a known compatability issue between the current hull shield system and the QuantaCore generator. FSA scientists are working diligently to resolve this issue. Life Support Systems: The Advent has no onboard life support systems. The Advent's pilot is solely dependent on the SpaceSkin Advanced Extreme Condition Pilot Survival Suit. When in the Advent, this suit is maintained by the Advent's QuantaCore generator and can maintain life support for indefinite periods. Outside the Advent, the suit can keep a pilot alive for approximately 3 weeks. In the event that the Advent is disabled or destroyed, the pilot has a high chance for recovery and survival. Should recovery not be an option, the suit is equipped with an A-9 suicide device which will vaporize both suit and pilot, and is completely painless. - Move Advent Roll Up/Down - Increase/decrease current cause Roll Left/Right - Increase/decrease current effect Press - Fire weapon - Launch/detonate bomb
- Decrease Advent speed
- Increase Advent speed
Cause Inventory - Displays the currently equipped cause element. Shield Energy Bar - Displays the Advent's current amount of shield energy. If shield energy is fully drained, the Advent's power system will not be able to regenerate shield energy and the next hit will destroy the ship! The current power level of the Advent's energy shield is displayed to the right of the shield energy bar. Remaining Ships - Displays the remaining number of Advents available, maximum of 6. Effect Inventory - Displays the currently equipped effect element. The current power level of selected element is displayed near the lower right hand corner of this box.
Speed Level - Displays the Advent's current speed level. Remaining Bombs - Displays the number of bombs currently in the Advent's inventory, maximum of 6. Bomb Configuration - The current bomb configuration is displayed briefly in the lower left hand corner of the screen whenever you change your cause or effect element.
There are 4 elements in Perfect Element which are used to configure the Advent's weapon systems. The four elements are fire, ice, lightning, and gravity. Your selected cause determines how enemies are affected when they have taken enough damage... Fire - causes an enemy to burst into flames and attempt to kamikaze into the Advent. The enemy takes continuous damage while they are burning. Ice - freezes an enemy in a solid block of ice, making them defenseless and halting their movement permanently. Lightning - fries an enemy's brain or electrical system, causing them to dart around unpredictably. The enemy takes continuous damage while they are being electrocuted. Gravity - generates a gravitational field around the enemy, pulls them toward its center, and does crushing damage to them. When the field dissipates, the enemy is left stunned for a brief period. Watch out - if the enemy has time to recover from being stunned, they will attempt to kamikaze into you! Your selected effect determines how your ammunition is dispersed... Fire - will disperse shots in a narrow spread pattern. Power level 1 has no spread, power level 2 fires 3 shots, power level 3 fires 5 shots.
Ice - will ricochet off enemies allowing for multiple hits and damage. Power level 1 has 1 ricochet, power level 2 has 2 ricochets, power level 3 has 3 ricochets. Lightning - will fire a high powered beam for directed damage and has the ability to disintegrate enemy fire. Power level 1 has beam end damage only, power level 2 adds side beam damage, power level 3 increases side beam range. Gravity - will fire a large, slow slug that causes massive damage and can pass through weaker enemies. Power level 1 fires 1 slug, power level 2 fires 2 slugs, power level 3 fires 3 slugs.
There are 10 different bomb types in Perfect Element. The bomb that is currently configured depends on your selected cause and effect. Bombs that have the same element for cause and effect are significantly more powerful than those that are a combination of different elements. Bomb configurations are as follows...
Fire + Fire: Napalm - Causes massive fire damage to all enemies. Fire + Ice: Aqua - Causes fire and ice damage to all enemies. Fire + Lightning: Solar Flare - Seeks out the nearest enemy and does catastrophic fire and lightning damage. Fire + Gravity: Backdraft - Causes fire and gravity damage to all enemies. Ice + Ice: Sub Zero - Causes massive ice damage to all enemies. Ice + Lightning: Static - Causes ice and lightning damage to all enemies. Ice + Gravity: Comet - Seeks out the nearest enemy and does catastrophic ice and gravity damage. Lightning + Lightning: Arc - Causes massive lightning damage to random enemies. Lightning + Gravity: Drain - Drains health from the nearest enemy and uses it to replenish the Advent's shields. Fizzles and dies if the Advent's shields are already fully charged. Gravity + Gravity: Black Hole - Consumes all enemies, debris, bullets, and powerups. Cause powerups are found in canisters and cycle through fire, ice, lightning, and gravity elements. Collecting one of these powerups will add the currently shown cause element to the Advent's inventory. Effect powerups are found in canisters and cycle through fire, ice, lightning, and gravity elements. Collecting one of these powerups will add the currently shown effect element to the Advent's inventory, or upgrade the power level for that element if it is already in the Advent's inventory. Bomb powerups are found in canisters and add 1 bomb to the Advent's inventory. Shield System Power powerups are found in canisters and increase the power level of the Advent's shield systems. Shield Booster powerups are found in canisters and give the Advent a 50% boost of shield energy for the shield system's current power level. Extra Advent powerups are found in canisters and add 1 extra Advent to the number of remaining ships. Perfect Element consists of 5 main levels, each consisting of 3 sub-levels. At the end of each main level you will confront a boss, which you must defeat in order to continue to the next main level. At the start of each main level you will find yourself in a launch tunnel, where you can select a default cause and effect for your ship. Choose wisely, as these selections will remain with you until you reach the next launch tunnel! FSA Obstacle Training Course - Before you embark on your first mission in the Advent, FSA requires you to run through their pilot training course. The goal here is to destroy as many space buoys as you can, as quickly as you can. Upon completion of the course, you will be ranked on the number of buoys destroyed and your course completion time, and rewarded accordingly. The higher you rank on the training course, the more difficulty levels are available to choose from.
Level 1: The Outer Reaches - Travel to The Outer Reaches to investigate a smuggling ring operation. This area is frequently used as a dumping ground and is filled with space junk and other various debris. Proceed with caution! Level 2: Asteroid Belt - Make your way through a giant asteroid belt to gather information on a secret enemy base. There are many large clusters of asteroids here - strategic use of bombs is highly recommended. Level 3: Asteroid Base Assault - Travel along the surface of a giant asteroid and mount an all out assault on the secret enemy base. Expect heavy resistance - strike fast and strike hard! Level 4: Deep Space Pursuit - Pursue and hunt down the escaping enemy's mothership. Deep space is the home of space squids - few have made a journey to the deep and survived to tell the tale! Level 5: Through the Wormhole - You have travelled through a wormhole in deep space while in pursuit of the enemy's mothership. This is an uncharted region, so proceed with extreme caution - there's no telling what you will run into here! Starting a new game will begin Perfect Element from the very beginning. Any current game in progress will be lost!! Character Selection - The story of Perfect Element is told through the journal entries of the character you select here. Each character has a different view on the events that unfold throughout the game, and is privy to different information on the missions depending on their rank.
Launch Tunnel - At the start of each main level you will begin in a launch tunnel. The launch tunnel is where you select the primary cause and effect for your ship. When the Advent is destroyed, all causes and effects will be lost except the ones you choose here. Selecting Primary Cause - If the selected cause is not in the Advent's inventory, it is added and made the primary cause. Otherwise, the cause in inventory is made the primary cause. Selecting Primary Effect - If the selected effect is not in the Advent's inventory, it is added and made the primary effect. Otherwise, the existing effect's power level is upgraded and made the primary effect. FSA Obstacle Training Course - Before you embark on your first mission in the Advent, FSA requires you to run through their pilot training course. The goal here is to destroy as many space buoys as you can, as quickly as you can. Upon completion of the course, you will be ranked on the number of buoys destroyed and your course completion time, and rewarded accordingly. The higher you rank on the training course, the more difficulty levels are available to choose from. Continuing a game in progress will allow you to continue from the start of the last main level reached. You will begin in a launch tunnel where you can select the primary cause and effect for your ship, and will start the level with a default number of bombs and remaining ships. The FSA Mission Simulator allows you to play through any sub-level you have previously reached in the game. Once a sub-level is unlocked, it will remain unlocked forever - even if you begin a new game. This is a great way to experiment with different weapon configurations to discover which configurations work best for different situations. The records screen displays the mission statistics records for a full game of Perfect Element. Level 1: The Outer Reaches
Boss: Salvage Rig Description: This is a standard issue Salvage Rig, built to be tough and reliable for salvage operations in the harshest of environments. Defenses: The Salvage Rig has no onboard weapon systems, but may attempt to use its automated claw to attack the Advent. Weaknesses: The only known weakness of the Salvage Rig is the cable which holds up its automated claw. The control booth on the bottom operates all of the Salvage Rig's main systems, but unfortunately the Advent's energy based weapons are useless against it. Our only hope is to find a way to hit the control booth with a large, physical mass. Level 2: Asteroid Belt Boss: Gravity Grinder Description: Gravity Grinders are typically used to clear paths through large asteroid fields. Because of its ability to hold large fields of asteroids behind it in a gravitational field, they have been a popular target for hijackers. Defenses: Reclaimed Gravity Grinders have commonly been upgraded to pull in and re-fuse smaller debris for the purpose of shooting them out at high velocities. Asteroids that are held by Gravity Grinders are in a very strong, unstable gravitational field and will be ejected violently if their physical structures are altered. Use caution when destroying them. Weaknesses: When a Gravity Grinder grinds asteroids it must lower its core shield to expel debris. After debris fusion, the Gravity Grinder enters a cool down period during which it cannot move and its core shield is disabled. Level 3: Asteroid Base Assault Boss: The Stack Description: The Stack is a layered attack ship of unknown design. It has the ability to arrange itself into different attack patterns and is rumored to have automated repair capabilities. Defenses: Middle layers have large, retractable guns with the ability to fire energy balls, slugs, and guided missiles, and automated repair capabilities. Little is known about the command center at the top of The Stack, but it is likely to be far more dangerous than all of the other layers combined. Weaknesses: Middle layers can only be damaged when layer doors are opened and the command module will only lose its shielding once the other layers are completely destroyed. The more damage you do, the quicker The Stack will attempt to repair the damage, so you must not let up with your attacks! Level 4: Deep Space Pursuit Boss: SuperSquid Description: SuperSquids are large, intelligent, aggressive deep space creatures. FSA biologists have little data on living SuperSquid behavior - all knowledge has been gained from research on recovered SuperSquid corpses. Defenses: SuperSquids have been reported to use the following attacks on their victims: Spitting acidic vomitus at them, sucking them into its mouth and eating them, calling in large hordes of squid babies, capturing ships and using them as weapons, and charging. The front tentacles, which guard the face of the SuperSquid, can regenerate quickly if damaged. Weaknesses: The SuperSquid has no known weakness. Disable any captured ships, destroy the sensitive front tentacles, and then hit it in the face with everything you've got. The best you can hope for is that it will lose interest and go elsewhere. Level 5: Through the Wormhole Boss: Symbiote Cruiser Description: The pirates' mothership, referred to by the pirates as the Symbiote Cruiser, is the only known ship to have survived an encounter with a SuperSquid. It is rumored that highly unethical biomechanical experimentation has been taking place on this ship. Defenses: Large, heavily armored, rapid fire gun turrets are likely to be your primary threat. A space debris protection system is likely to be in place, which will fry the Advent if it gets too close. It is also likely that the pirates have affixed death rays to their ship. This highly illegal weapon is a red beam of pure anti-matter and can destroy a much larger ship in a matter of seconds - it will destroy the Advent instantly upon contact. Other unknown defense systems are possible. Weaknesses: Shields are likely to be concentrated on the gun turrets and bridge, so begin by weakening the hull. Once sufficiently damaged, the pirates are likely to shift power resources and leave other parts of the ship vulnerable. |